


Print Specifications
Please submit files in industry standard formats, that are not dependent on the application, fonts or other separate design elements used in creation.
We recommend saving and providing us with PDF files with outlined fonts. PDF files are easier to handle and will likely speed up your turn-around.
You may also send files in the following types: JPG, JPEG, TIF, TIFF, and EPS. If a bitmap image is being sent, please ensure resolution is 300 DPI or higher. Remember to flatten your files before uploading.
Located below you will find these sections:
Quick File Setup/Instructions:
- All bitmap images/files must be at least 300 dpi resolution
- For rich black please use C:60% / M:40% / Y:40% / K:100%
- CMYK Color Mode : If you do not send us CMYK artwork we will convert your files to CMYK and "color shifting" may occur!
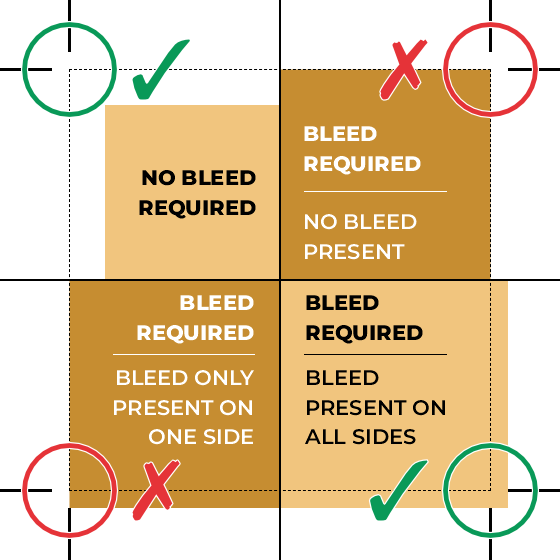
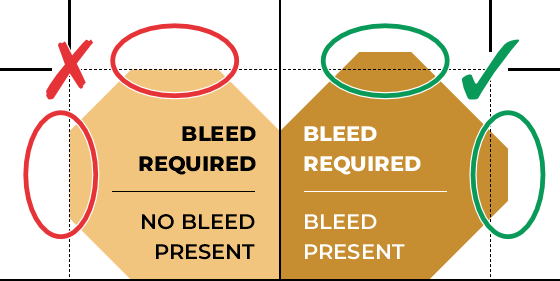
- Keep anything you do not want cutoff at least 0.125" away from all edges
- Artwork MUST contain a 0.125" bleed (explained below).
- Artwork should not contain any crop marks. However, if your application requires adding bleed with crop marks, bleed is necessary — just ensure the crop marks are outside the bleed area and at least 0.125" away from the cut line. See examples directly below.
Note: If you are using Canva for design, please review the 'Canva-Specific File Setup Instructions' section below to ensure your files are set up correctly for print and that your vision for the project is achieved.
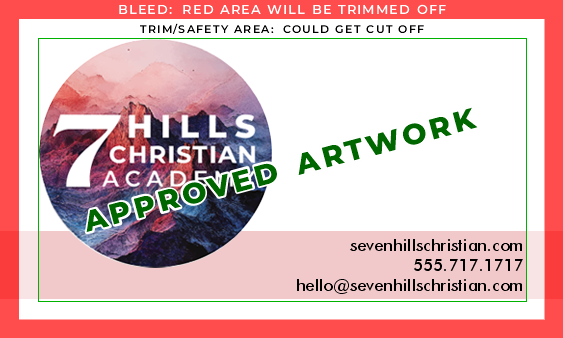
EXAMPLES OF FILES REQUIRING BLEED – Proper and Improper Setup
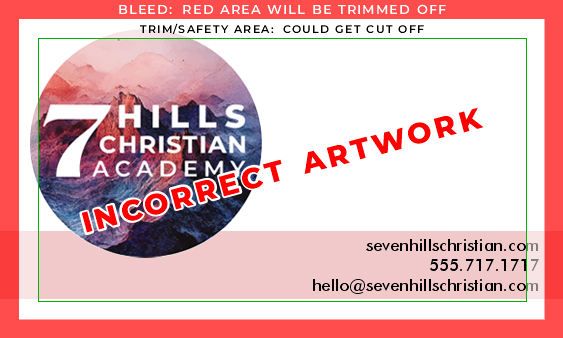
ADDITIONAL EXAMPLES OF FILES REQUIRING BLEED – Proper and Improper Setup
Canva-Specific File Setup Instructions:
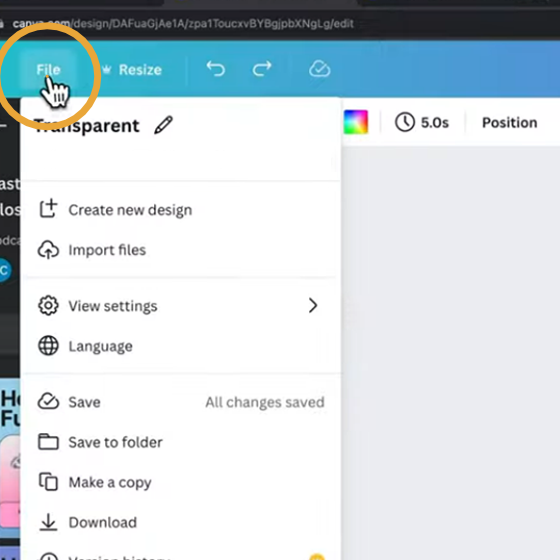
Canva File Setup – Step 1 of 14
Select the 'File' menu button.
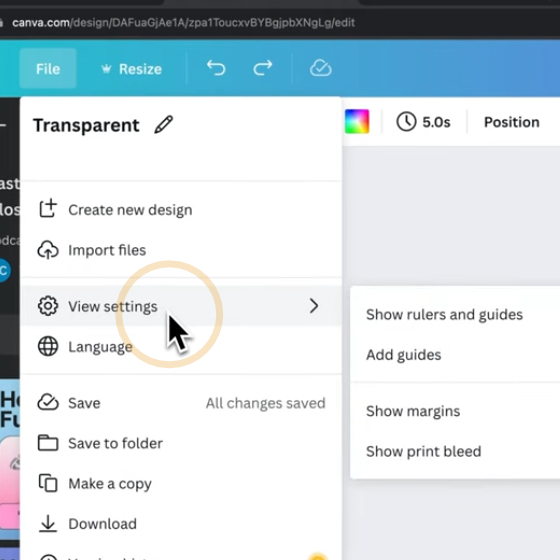
Canva File Setup – Step 2 of 14
Select the 'View settings' menu button.
Canva File Setup – Step 3 of 14
Select the 'Show print bleed' menu button.

Canva File Setup – Step 4 of 14
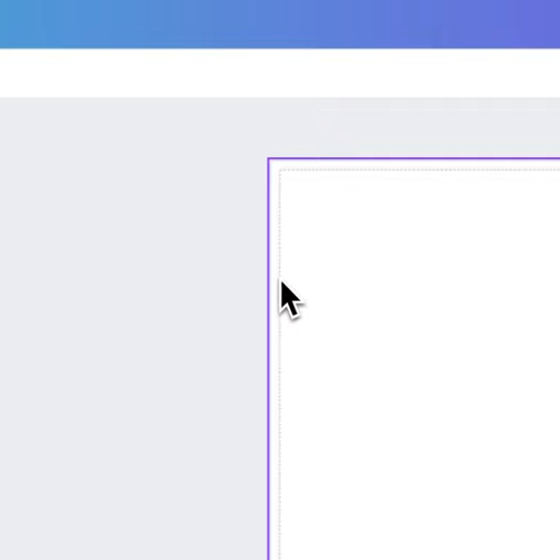
The bleed area (the space between the dotted line and the edge of the canvas) has been added.
Canva File Setup – Step 5 of 14
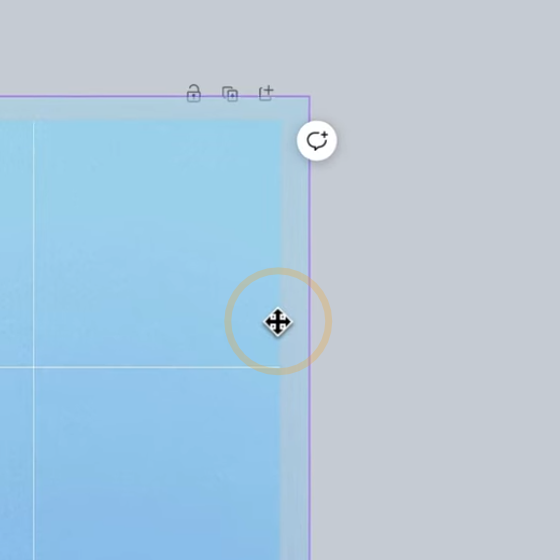
The light blue photo background does not extend beyond the cut line to fill the bleed area. The dark blue highlights this issue. As a result, the file will not export with a proper bleed.

Canva File Setup – Step 6 of 14
Double-click the photo background and extend it to the edge of the canvas, ensuring it reaches through the bleed area (between the dotted line and the edge of the canvas). Then, click outside the photo (in the gray area).
Canva File Setup – Step 7 of 14
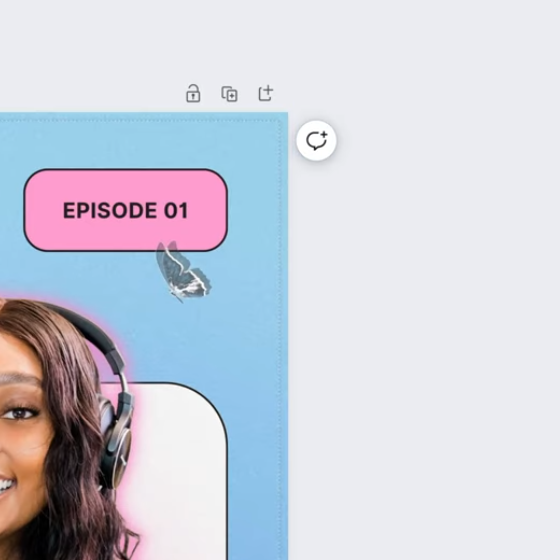
Ensure the bleed area is fully covered by the background photo.
Canva File Setup – Step 8 of 14
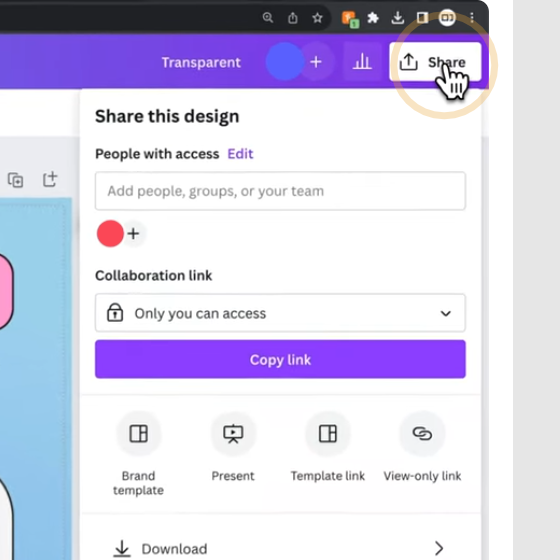
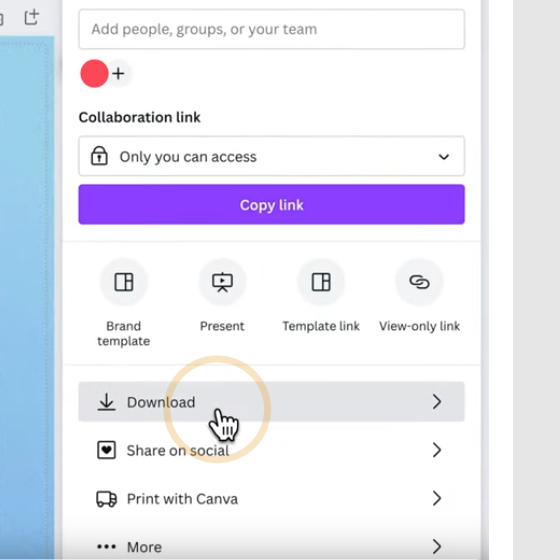
Select the 'Share' button located in the upper-right corner.
Canva File Setup – Step 9 of 14
Select the 'Download' button.
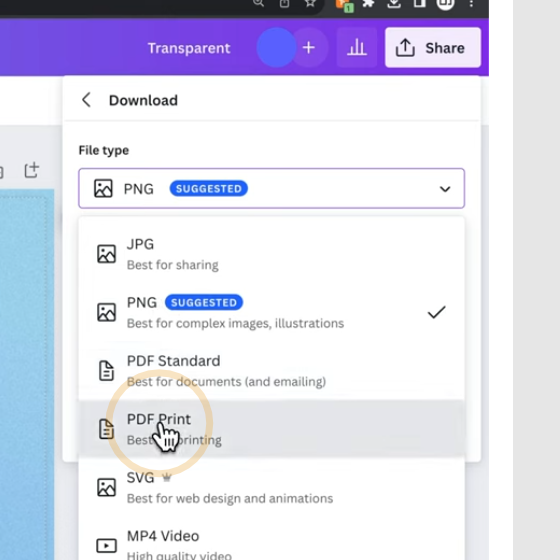
Canva File Setup – Step 10 of 14
From the File type dropdown menu, select 'PDF Print (Best for printing)'.
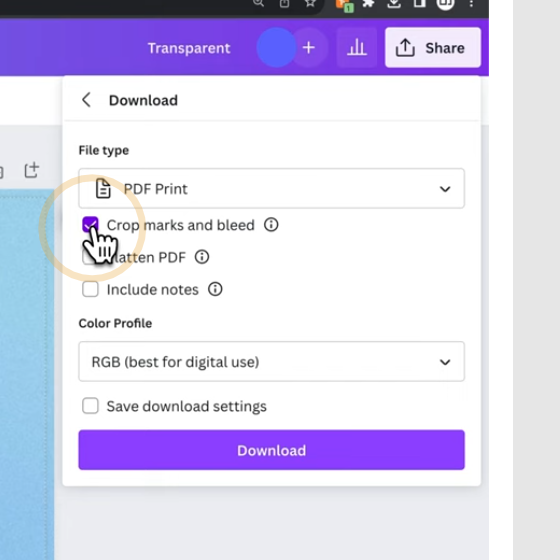
Canva File Setup – Step 11 of 14
Select the 'Crop marks and bleed' checkbox.
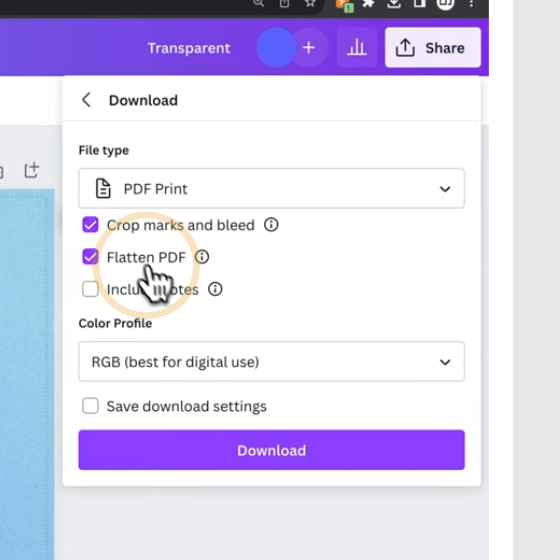
Canva File Setup – Step 12 of 14
Select the 'Flatten PDF' checkbox.
Canva File Setup – Step 13 of 14
From the Color Profile dropdown menu, select 'CMYK (Best for professional printing)'.
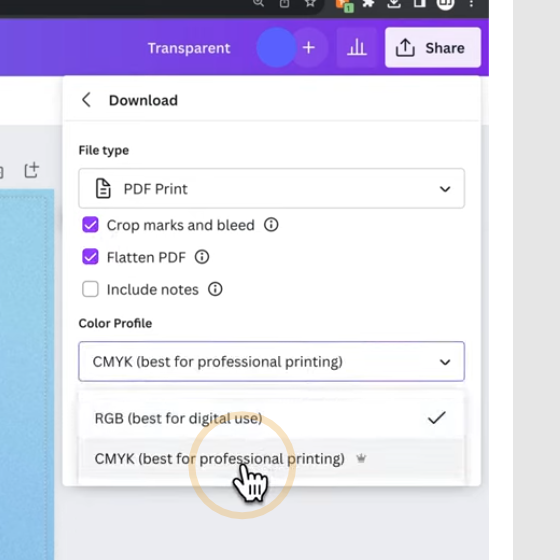
Canva File Setup – Step 14 of 14
Select the 'Download' button.

Detailed File Setup/Instructions:
Learn more about the importance of properly setting up your files by reviewing the "File Specifications – Color Modes, Bleeds, Overprint, etc." section in our FAQs. This section explains key concepts such as color modes, bleeds (what they are and how to set them up), and overprints (and how they can cause unexpected issues). Providing properly prepared files is essential to ensure your project meets your expectations.
Here is a general example of how to lay out a file for a business card, including the appropriate 'bleed area' and the 'safety zone' to avoid placing important content too close to the edges. Please follow these guidelines for all files submitted, regardless of the product type being ordered.
ARTWORK MUST HAVE 0.125" FOR BLEED AND 0.125" FOR SAFETY ON ALL SIDES.
We can not guarantee any print job cuts without the bleed
Business Card Sample Setup – This file is setup PROPERLY.
All important content is positioned within the TRIM/SAFETY AREA.
Business Card Sample Setup – This file is setup IMPROPERLY.
Some important content is positioned outside the TRIM/SAFETY AREA, introducing the risk of it being trimmed off on your finished product.
What type of files should I send to Kingdom Print?
Please submit files in industry standard formats, that are not dependent on the application, fonts or other separate design elements used in creation.
We recommend saving and providing us with PDF files with outlined fonts. PDF files are easier to handle and will likely speed up your turn-around. Remember to flatten your files before uploading.
For Roll Labels, we recommend designing:
- Vector files (e.g. EPS or PDF)
- 300 DPI or higher
- Use black (100% K)
- For fine lines and text smaller than 9pt, use black (100% K) only
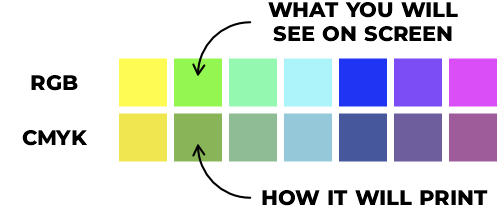
Your designs should always be created and delivered in CMYK color mode. If files are provided in RGB or Pantone/PMS color formats, we will convert them to CMYK. However, “color shifting” may occur during the conversion process, and you may not be satisfied with the final result.
Here is what you may expect in an RGB-to-CMYK conversion.
Here is what you may expect in a Pantone-to-CMYK conversion.
